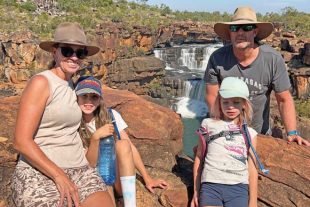
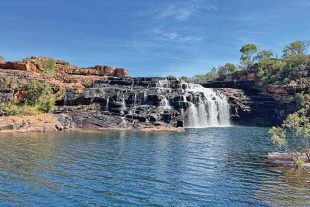
I USUALLY talk about fishing in the Hinchinbrook Island area but this month I’m going to discuss something else I am passionate about, which is getting out bush or up north with the family and going camping.
Normally when I go hunting or fishing with my mates we keep it pretty simple. A swag, Esky, little butane gas cooker, beers and bangers and we are away. But it’s a little different with a young family and, let’s face it, I am getting old and starting to like a few creature comforts.
My wife Raylene and I had been thinking about getting a camper trailer or caravan and went along to quite a few camping and caravan expos, getting a really good look at what was available. And wow, some fantastic off-road caravans and camper trailers are on the market.
After looking at a heap, we narrowed it down to a couple we really liked. But when we sat down and thought about what we like to do and the places we like to go, we realised 90 percent of our travels involve a boat or going to a place where it is just too rugged to tow something in there.
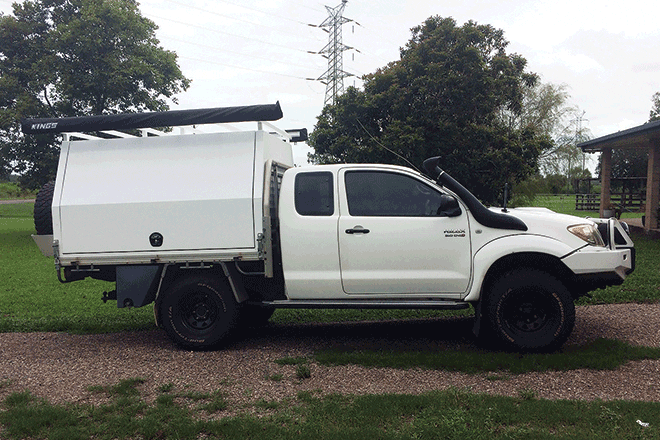
About 12 months ago, Raylene and I discussed a Jackoff-style canopy to go on the ute. We felt this was a decent idea for a number of reasons. First, we could still tow a boat to remote fishing locations; second, we wouldn’t have to pay any extra registration; and third, when not using the canopy we could simply jack it off and store it in the shed, allowing us to still use the ute as a ute.
So after sitting down and drawing up several floorplans, we sent our ideas off to a couple of fabricators for pricing. We opted to get an aluminium canopy built to our specifications and I then proceeded to do the fit-out myself, which literally saved us thousands.
Doing this allows you to add those little custom touches and modifications to best suit your needs. The canopy was made to fit our extra-cab Toyota HiLux. Our tough Lux is an oldie but a goodie. It’s a 2008 model with all the extras such as a suspension lift, BF Goodrich Mud-Terrain tyres, ARB Air Lockers front and rear, a winch bar, winch, spotties, snorkel, long-range fuel tank and the list goes on.
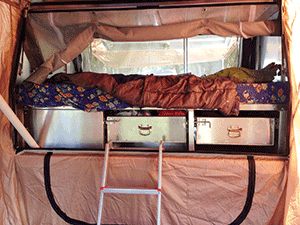
It is decked out to conquer most remote roads and get into those harder to reach fishing destinations. The canopy setup has two big doors, one on the driver’s side and one on the passenger side. On the driver’s side against the headboard we fitted a full-length drawer that opens right out.
This is just a general storage drawer where we can put firearms, camp chairs, tools, spares and heaps of other miscellaneous items. Just next to that is another drawer that we use to store clothing, towels and toiletries. Also on the driver’s side is a roll-out awning measuring 2.5m x 3m.
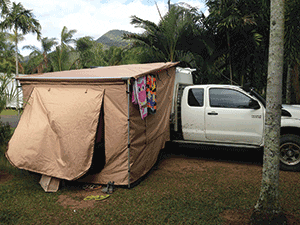
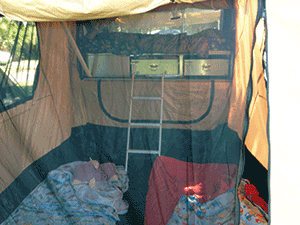
We got a tent that clicks onto the awning and then we took it to a trimmer to have it modified to seal around the opening of the door. This gives us a nice tent section on that side of the vehicle that opens up into the back of the canopy.
This is where the kids sleep and it’s an area where we can sit at night-time totally sealed off from mosquitos, bugs and the elements.
As for bedding, we have a queen-sized mattress that fits perfectly on top of the drawer system for Raylene and I to sleep, while two single mattresses sit on top of our bed until we are ready to sleep and we then slide these mattresses onto the floor in the tent section to give the kids a comfortable place to sleep.
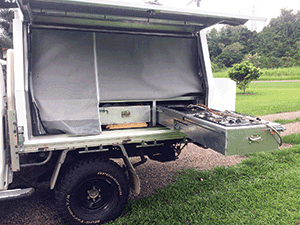
On the other side of the vehicle are another two drawers. The back drawer slides all the way out and this is our custom kitchen, with a four-burner gas cooktop and kitchen sink with a built-in cutlery drawer. The next drawer in is a huge pantry where we store all our food for long trips.
We have a big Evakool fridge that sits against the headboard and is lifted out onto the ground for easier access. I want a drop-down fridge slide but I haven’t quite worked out how we are going to do it just yet. A work in progress. The kitchen side is screened off so no bugs can get into our sleeping quarters or over to the other side of the tent.
Another 2.5m x 3m awning rolls out on this side to give us shade over the kitchen, tables and chairs. Once we’ve pulled up we put a ground sheet down to help minimise tracking in sand and dirt. Because we run the fridge, we also required a second battery, so we run a deep-cycle battery with a REDARC isolator.
This allows us to run the fridge without draining our vehicle battery. We went for the Evakool fridge because it is quite big at 70 litres but is still very efficient and can run on that one battery for three days without a recharge. To power the canopy, we have run a lead back to the REDARC system and the headboard with an Anderson plug.
I then wired the canopy separately to the other side of the Anderson plug so it can be disconnected when we jack off the canopy. The wiring was really pretty easy. Other than that, we have another Anderson plug for the fridge to connect to and two switches for cabin lights in the kitchen and inside the tent.
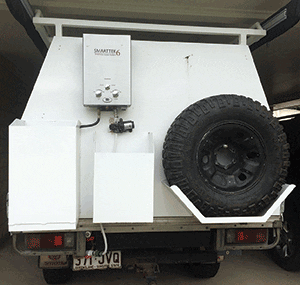
I wired in a USB and cigarette lighter plug to charge the electronics and installed a water pump switch. We also threw in an LED voltage metre, which allows me to keep an eye on the battery power. On the back of the canopy is a spare wheel rack for our spare, a jerry can holder and a 9kg gas bottle holder, which is more than enough for our cooking and hot water system.
Yes that’s right, a hot water system. This thing is absolutely amazing and I thoroughly recommend you get one. Quite a few are on the market but we opted for a Smarttek instant hot water system. The Smarttek is permanently mounted on the back of the canopy and under the tray are 110-litre and 45-litre water tanks.
The Smarttek just clips onto the water tank with a hose fitting, so when we jack the camper onto the back of the ute, it is simply a matter of clipping the hose from the Smarttek onto the water tank and opening the water valve. Once connected to the water supply, the hot water system connects to the gas bottle and you simply switch on the pressure pump and screw the shower head on.
Flick a little switch on the bottom of the system, and being battery operated, it ignites as soon as we flick the shower head on and gives us instant hot water. It is fantastic and has two settings for either summer or winter. The winter setting will just about scorch your hand, which is great for washing dishes, and the summer setting is ideal for bush showers.
Our sweet camp setup only takes a maximum of 10 minutes to set up completely, which is fantastic if we want to pull up during the night to break up a long drive. I hope you liked the article! Until next month.
P.S. it’s been raining lots and the barra season kicks off on February 1 – yeeha!
 Bush ‘n Beach Fishing Magazine Location reports & tips for fishing, boating, camping, kayaking, 4WDing in Queensland and Northern NSW

