Well, here it is, my favourite part and the steps that matter after all your hard work… the cooking that is, not the cleaning up.
Before starting up Suncoast Skutes, I was a passionate and devoted chef, so hopefully I can nail a few good pointers for you this month.
Without blathering on, we’re going to look at the most likely cooking methods and dish out the tips to go with them.
Barbecue
Let’s get the hard one out the way first.
A gas or woodfired barbecue is never very forgiving, especially if there’s dripping oil or burning marinade going on.
But don’t worry, it’s not only steak and corn that steal the limelight.
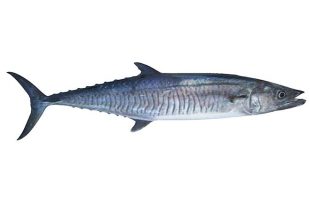
A well-cooked mackerel cutlet or dry rubbed side of mahi mahi done in tin foil is a winner, though not a show stopper by any means.
Well marinaded fish with a light rubbing of oil will char nicely and create enough smoke to give a good flavour on a gas grill, whereas lighter seasoned portions cooked on a wood fire away from the direct heat for longer offer a delicate smoky taste that will really surprise you.
Because of the heat, it’s always handy to oil a separate rack and use that to cook on, so you can easily lift the fish away from cooking too quickly.
Without getting too methodical, my favourite is paperbark wrapped fish, which is simply seasoned fish portions in flaked layers of soaked paperbark with plenty of seasoning, herbs and lemon juice.
As the bark cooks, it will steam the fish and eventually smoke once it dries out and catches alight.
A blow torch and water spray will help to boost or reduce what’s going on.
Deep frying
While it’s fairly self-explanatory, it does often go wrong.
Loss of surface temperature or too much frying in a short space of time is caused by not having enough oil and/or having the wrong shaped pan for the job.
The best advice I can give is to make sure your oil is properly hot, and fry in small batches.
As the outside seals, no oil can penetrate further and the fish begins to steam from the inside, which leaves it juicy.
By slightly undercooking the portion and placing it on a baking rack on a tray in a warmed oven, it will continue to cook slightly while you cook your next pieces.
For flavoured fish, it’s best to season the fish itself with seasoned flour and then use a seasoned egg wash, so the outer crumbs protect the spices a little from burning.
Otherwise, a well-marinaded fillet of fish dipped in flour, then thin batter, then flour again, will give you fantastic eating.
Parmesan or salt and vinegar crisps can be added through the breadcrumbs for an added dimension too, but try using panko breadcrumbs for better crunch.
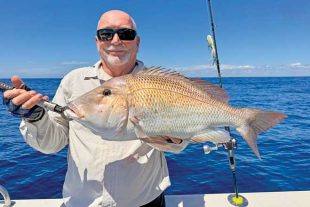
Snapper, pearl perch, flathead and whiting are my top picks for deep frying.

Baking or pan roasting
Normally, fish go through the oven to die a second time, but it doesn’t have to be this way – there are plenty of little hacks to avoid dry and overcooked fish.
First, preparation is key.
Try to get all the pieces the same size, so they cook at the same time.
Also, having the fillets at room temperature, so heat transfers through the centre easier, is important for a better result.
To create a barrier of moisture, the next step is to prepare a fan-assisted oven at 160C with a tray on the bottom containing a good splash of water.
For baking, always use greaseproof paper and season the fish before cooking.
Even better, give it a dry rub of herbs and spice mix.
I tend to leave the skin on and peel it off once cooked, so I personally don’t make too many scores.
When pan roasting, I’ll always get a nice crispy skin in the pan first – and I won’t turn the fish over until the very last minute – before transferring it to the oven,.
When 90 percent cooked, it then comes out of the pan to rest and finish cooking in its own residual heat.
If you aren’t too fussed about cooking straight away, you can build individual parcels using tin foil lined with baking paper and adding some kind of flavoured butter and herbs spread across the fish.
Chuck these in the oven at a social gathering or family dinner party, leaving more time for actually socialising.
If you have a probe thermometer, cook the fish to about 63C and let the steam do the rest, it’s a winner.

Pan frying
Being a chef, this is by far my preferred method of cooking.
I love the satisfaction and flavour of a well-crisped fillet of mahi, or even the texture it gives a piece of venus tuskfish, with skin that looks like honeycomb after a solid searing in oil and butter.
While there are no rules as such, it’s a given that you don’t want your fish to stick halfway through cooking, so here’s a little trick – oil the fish and not the pan!
What this means is that you can get a nice hot pan without burning any oil and be able to test it by listening for a sizzle when you touch the pan with the edge of the fish before committing to the whole fillet.
This also ensures the whole surface has an even coating, which will allow heat to spread evenly across the cooking surface.

Top two tips
First, it almost goes without saying that a decent non-stick Teflon-coated – or even better, seasoned cast-iron – pan will help.
Not that I see many cast iron pans in home kitchens, so let’s just go with the first option.
Second, patience!
Cook the fish 70-80 percent of the way on one side, maintaining a relatively high temperature to get a crispy golden skin or a nicely caramelised crust on a portion of larger fillet cut as a steak.
If you add butter gradually, you can use a tablespoon to baste the fish with the hot butter as you wait for the skin to crisp up.
If you give the fish a nudge with a fish slice, it should come away from the pan, indicating it can be flipped without sticking and falling apart.
If the pan is too hot, the fish will want to curl up.
Simply take the pan to one side and the fish will flatten out again as the pans cools slightly.
Otherwise, use your hands to press it down so you can feel the oil bubbling through the flesh.
This will do the trick for a good seal of the skin.
I hope these tips help and/or inspire you.
Tight lines and happy cooking team.
Caring for your catch – Part 1 Caring for your catch – Part 2
 Bush ‘n Beach Fishing Magazine Location reports & tips for fishing, boating, camping, kayaking, 4WDing in Queensland and Northern NSW


